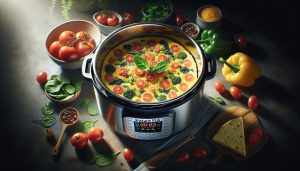
Welcome to the world of cooking convenience and deliciousness with your trusty Instant Pot! In “How to Convert Traditional Recipes for the Instant Pot,” you’ll discover the secrets to transforming your favorite stove-top meals into quick, time-saving wonders without compromising on flavor or texture. This guide will walk you through essential tips like adjusting cooking times, rethinking liquid amounts, and ensuring your ingredients come out perfectly cooked every time. By the end, you’ll feel confident in tackling any recipe and making it work beautifully in your Instant Pot, bringing joy and ease back into your kitchen adventures. Have you ever wondered how to convert your favorite traditional recipes for the Instant Pot? You’re not alone! The Instant Pot has taken kitchens by storm, offering a quick, efficient, and flavorful way to cook. But how do you transform your go-to recipes into Instant Pot masterpieces? Glad you asked! This guide will walk you through every step, making the transition from your conventional stove or oven to your Instant Pot as seamless as possible.

Understanding the Basics of the Instant Pot
Before diving into conversion techniques, it’s essential to understand what makes the Instant Pot unique. The Instant Pot is a multi-functional cooker that combines several kitchen appliances into one. It can pressure cook, slow cook, sauté, steam, and even make yogurt. Its versatility is one of the main reasons it’s become so popular.
Why Use an Instant Pot?
You might be wondering why you should go through the trouble of converting your traditional recipes for the Instant Pot. Here are a few compelling reasons:
- Speed: The pressure cooking function significantly reduces cooking time.
- Convenience: One appliance can handle multiple cooking methods.
- Flavor: The sealed cooking environment helps to lock in flavors and nutrients.
- Energy Efficiency: The Instant Pot uses less energy compared to a traditional oven or stovetop.
- Ease of Cleanup: Fewer pots and pans mean less washing up afterward.
Common Adjustments for Instant Pot Cooking
To convert traditional recipes for the Instant Pot, you’ll need to make a few adjustments. These usually involve tweaking the cooking time, liquid amounts, and understanding the release methods. Let’s break it down.
Cooking Time
The Instant Pot cooks much faster than conventional methods due to its pressure-cooking ability. Below is a basic comparison table for common ingredients:
| Ingredient | Conventional Cooking Time | Instant Pot Cooking Time |
|---|---|---|
| Chicken Breast | 25-30 mins | 8-10 mins |
| Dried Beans | 1-2 hours | 25-30 mins |
| Potatoes | 20-25 mins | 10-15 mins |
| Rice | 15-20 mins | 4-8 mins |
Note: Always check the Instant Pot manual for specific cooking times, as they can vary slightly based on the model and recipe.
Liquid Requirements
Due to its sealed cooking environment, the Instant Pot requires less liquid than traditional cooking methods. Here are some general guidelines:
- Soups and Stews: Use approximately 2/3 of the liquid called for in the original recipe.
- Braised Dishes: Reduce the liquid content by about half.
- Grains and Pasta: Stick to the recommended water-to-grain ratio provided in the Instant Pot manual.
Release Methods
The Instant Pot offers two types of pressure release: Quick Release (QR) and Natural Release (NR).
- Quick Release (QR): This method releases the pressure immediately. It’s best for vegetables and delicate ingredients that can become mushy if overcooked.
- Natural Release (NR): This allows the pressure to decrease gradually. It’s ideal for meats and grains to retain moisture and texture.

Step-by-Step Conversion Process
Now that you have a basic understanding, let’s go through the step-by-step process of converting a traditional recipe for the Instant Pot.
Step 1: Identify the Key Elements
Break down your traditional recipe into its main components:
- Main ingredient (e.g., chicken, beef, vegetables)
- Cooking method (e.g., braising, boiling, roasting)
- Cooking time
- Liquid amount
- Seasonings and spices
Step 2: Adjust the Cooking Time
Refer to the basic comparison table or the Instant Pot manual to adjust the cooking time. For instance, if your recipe calls for an hour of simmering, you might need only 30 minutes under pressure.
Step 3: Modify Liquid Amount
Reduce the liquid content according to the guidelines mentioned earlier. Remember, too much liquid can dilute flavors, while too little can cause burning or uneven cooking.
Step 4: Choose the Release Method
Decide whether Quick Release or Natural Release is more appropriate for your dish. This will largely depend on the type of ingredient and the desired texture.
Step 5: Cook and Test
Once all adjustments are made, cook the dish in your Instant Pot and test for flavor and doneness. Don’t be discouraged if it isn’t perfect the first time; minor tweaks might be necessary.
Special Considerations for Different Types of Recipes
Not all recipes are created equal, and some require specific adjustments when converting for the Instant Pot. Here are some tips for various types of dishes:
Soups and Stews
- Liquid Adjustment: Reduce the liquid by roughly a third.
- Cooking Time: Most soups and stews need only 10-15 minutes under pressure.
- Release Method: Natural Release is generally best to allow flavors to meld.
Meat and Poultry
- Cooking Time: Cuts of meat like beef stew meat should be cooked for 20-30 minutes, while chicken breasts usually need about 8-10 minutes.
- Searing: Sear the meat using the Sauté function before pressure cooking to enhance flavors.
- Release Method: Natural Release is often better for meats to retain moisture and tenderness.
Rice and Grains
- Water Ratio: Follow the Instant Pot manual’s rice-to-water ratio, generally 1:1 for white rice and 1:1.25 for brown rice.
- Cooking Time: White rice requires approximately 4-8 minutes; brown rice takes around 20-22 minutes.
- Release Method: Natural Release is usually better for grains to avoid mushiness.
Vegetables
- Cooking Time: Vegetables cook much faster; most require only 1-3 minutes.
- Liquid: Add at least 1 cup of liquid to avoid burning.
- Release Method: Quick Release is generally best to prevent overcooking.
Advanced Tips for Better Results
Layering Ingredients
Layering can make a significant difference, especially if you’re cooking a one-pot meal. Place denser items like meats and root vegetables at the bottom and more delicate ingredients like fish or leafy greens on top.
Using Pot-in-Pot Method
The pot-in-pot method is useful for dishes that can’t be cooked together directly. It involves placing a separate bowl inside the Instant Pot. This technique is excellent for cooking rice along with a stew or steaming delicate fish while cooking vegetables.
Sauté Function
Don’t underestimate the value of the Sauté function. Use it to:
- Sear meats for enhanced flavor.
- Cook onions, garlic, and spices before pressure cooking to release their full flavors.
- Thicken sauces and broths after pressure cooking by reducing them using the Sauté function.
Troubleshooting Common Problems
Undercooked Food
If your food comes out undercooked, you can always put the lid back on and cook it for a few more minutes under pressure. Common reasons for undercooking include not enough liquid, incorrect cooking time, or a faulty seal.
Overcooked or Mushy Food
Overcooking usually occurs due to unnecessarily long cooking times or failure to release pressure promptly. Always err on the side of slightly undercooking, as you can always add more time, but you can’t undo overcooking.
Burn Message
The dreaded “burn” message appears when there’s not enough liquid or the food is too thick at the bottom. To prevent this:
- Ensure you’re using enough liquid.
- Stir the food well to distribute ingredients evenly.
- Avoid thick, starchy ingredients sticking to the bottom.
Sample Recipe Conversion: Beef Stew
Let’s take a traditional beef stew recipe and convert it step-by-step for the Instant Pot.
Traditional Recipe Ingredients
- 2 lbs beef stew meat, cubed
- 3 cups beef broth
- 1 cup red wine
- 2 cups diced carrots
- 2 cups diced potatoes
- 1 onion, chopped
- 3 cloves garlic, minced
- 2 tbsp tomato paste
- Salt and pepper to taste
- 2 tbsp flour (optional)
Traditional Cooking Instructions
- Sear the Meat: Brown beef cubes in a hot pot until all sides are seared.
- Add Ingredients: Add onions, garlic, carrots, potatoes, tomato paste, beef broth, and red wine.
- Simmer: Bring to a boil, then reduce to a simmer for 1-2 hours until the meat and vegetables are tender.
- Season: Season with salt and pepper, and thicken with flour if desired.
Instant Pot Conversion
Adjusted Ingredients
- 2 lbs beef stew meat, cubed
- 2 cups beef broth (less liquid required)
- 1 cup red wine (same amount)
- 2 cups diced carrots
- 2 cups diced potatoes
- 1 onion, chopped
- 3 cloves garlic, minced
- 2 tbsp tomato paste
- Salt and pepper to taste
- 2 tbsp flour (optional)
Instant Pot Cooking Instructions
- Sear the Meat: Use the Sauté function to brown the beef cubes on all sides.
- Add Ingredients: Add onions, garlic, carrots, potatoes, tomato paste, beef broth, and red wine.
- Pressure Cook: Close the lid and set the Instant Pot to Pressure Cook (or Manual) for 35 minutes.
- Natural Release: Allow the pressure to release naturally for 10 minutes, then open the valve for a Quick Release.
- Thicken Sauce: If desired, switch back to the Sauté function and stir in the flour to thicken the stew.
- Season: Adjust seasoning with salt and pepper before serving.
Final Thoughts: Experiment and Enjoy!
Converting traditional recipes for the Instant Pot isn’t just about following rules—it’s also about getting creative and having fun in the kitchen. The more you experiment, the more you’ll understand the nuances of this versatile appliance. And the best part? You get to enjoy delicious meals in a fraction of the time.
Recap of Key Points:
- Understand the basics of the Instant Pot, including its functions and benefits.
- Tweak cooking times, liquid amounts, and release methods.
- Follow a step-by-step process for seamless conversions.
- Pay special attention to different types of recipes.
- Use advanced tips like layering, the pot-in-pot method, and the Sauté function.
- Troubleshoot common issues to improve your cooking experience.
So, go ahead and start converting your favorite traditional recipes for the Instant Pot! You’ll be amazed at how much time and effort you can save while still enjoying tasty, home-cooked meals.

